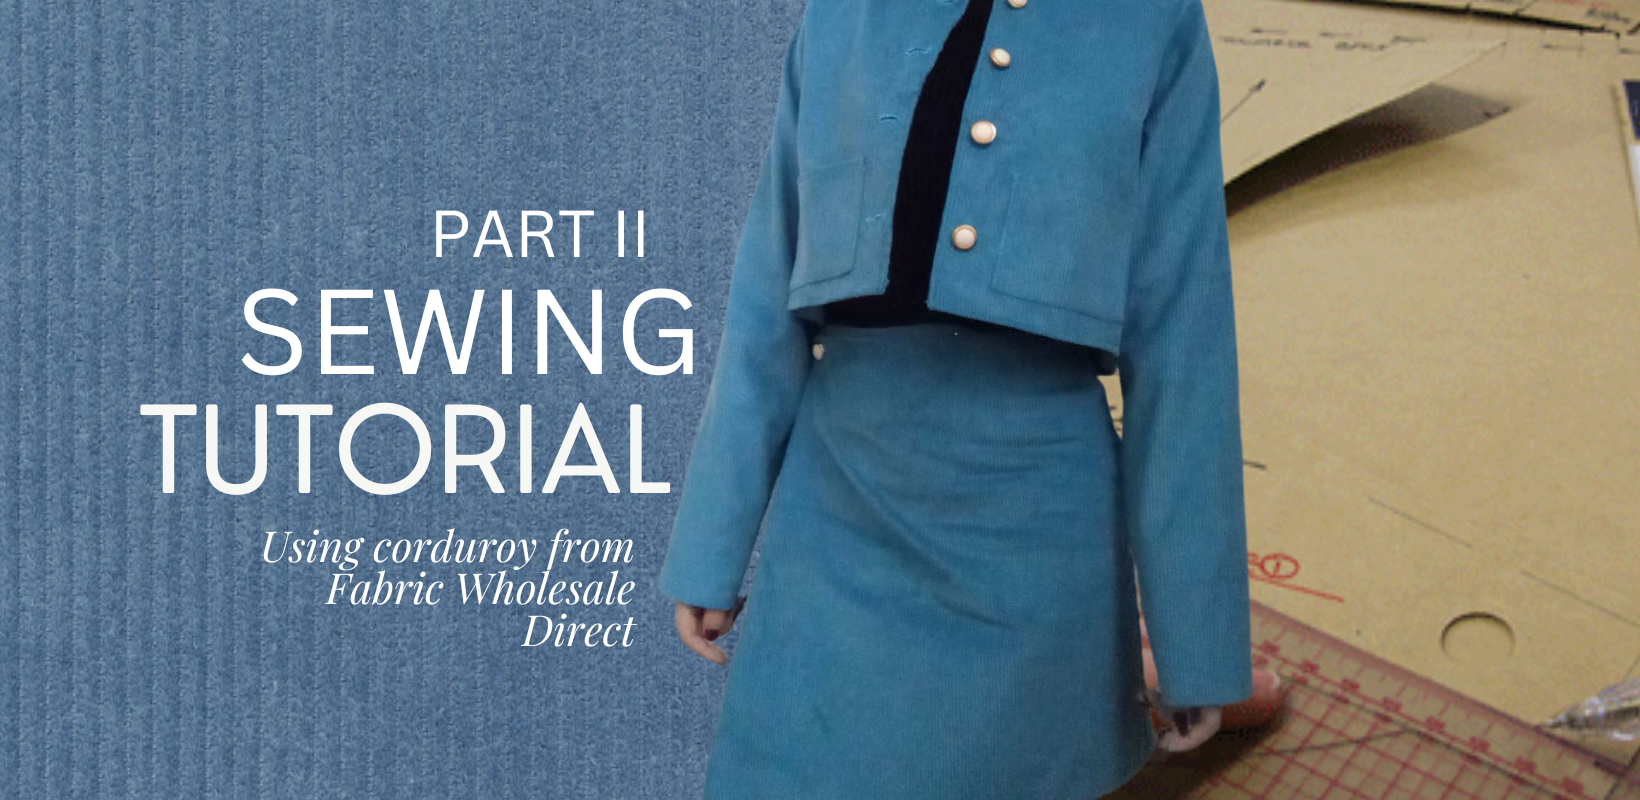
tutorial part 2: cropped jacket
(Using corduroy from Fabric Wholesale Direct)

Whether you pair it with a high-waisted skirt and boots for a cozy fall day or wear it with your favorite jeans for a casual-chic look, this cropped corduroy jacket is the perfect combination of versatility and casual style! If you love sewing or want to learn how to create a stylish, custom piece with your own hands, you’ve come to the right place.
This time, Fabric Wholesale Direct was our fabric supplier :). I chose their Standard 9 Wale corduroy in denim blue – it’s vibrant, soft to the touch, and has a crisp yet durable texture. Plus, since it’s made from 100% cotton, it aligns perfectly with our commitment to using materials from natural sources.
Ready to get started? Whether you sourced your fabric from Fabric Wholesale Direct or are upcycling something you already have, this tutorial will guide you through creating a stunning cropped jacket that’s as stylish as it is easy to make. Perfect for beginners and experienced sewers alike, this step-by-step guide will help you create a timeless piece that will enhance your wardrobe with minimal effort.
This tutorial is the second part of our skirt and jacket set series. Today, we’ll be focusing on the cropped jacket. Get your tools ready and get to work! At the end, we’ll also share some fabulous outfit ideas to inspire you to style this stylish piece.
So what do you need for this project?
♡ I´m using corduroy but other fabrics can also work. You can also check out the Fabric Wholesale Direct webstore. (Depending on your size, the amount of fabric you will need is from 1 to 2 yards.)
♡ Thread of the color you want.
♡ 6 buttons. (4 or 5 for the jacket and 1 for the skirt)
♡ Scissors or a roller cutter.
♡ Sewing machine or needle. (You can also do it by hand although it will require a little more time).
♡ Tape measure.
Now that everything is ready! Time to roll up our sleeves!
CROPPED JACKET
Here you will learn how to draw patterns in a simple way
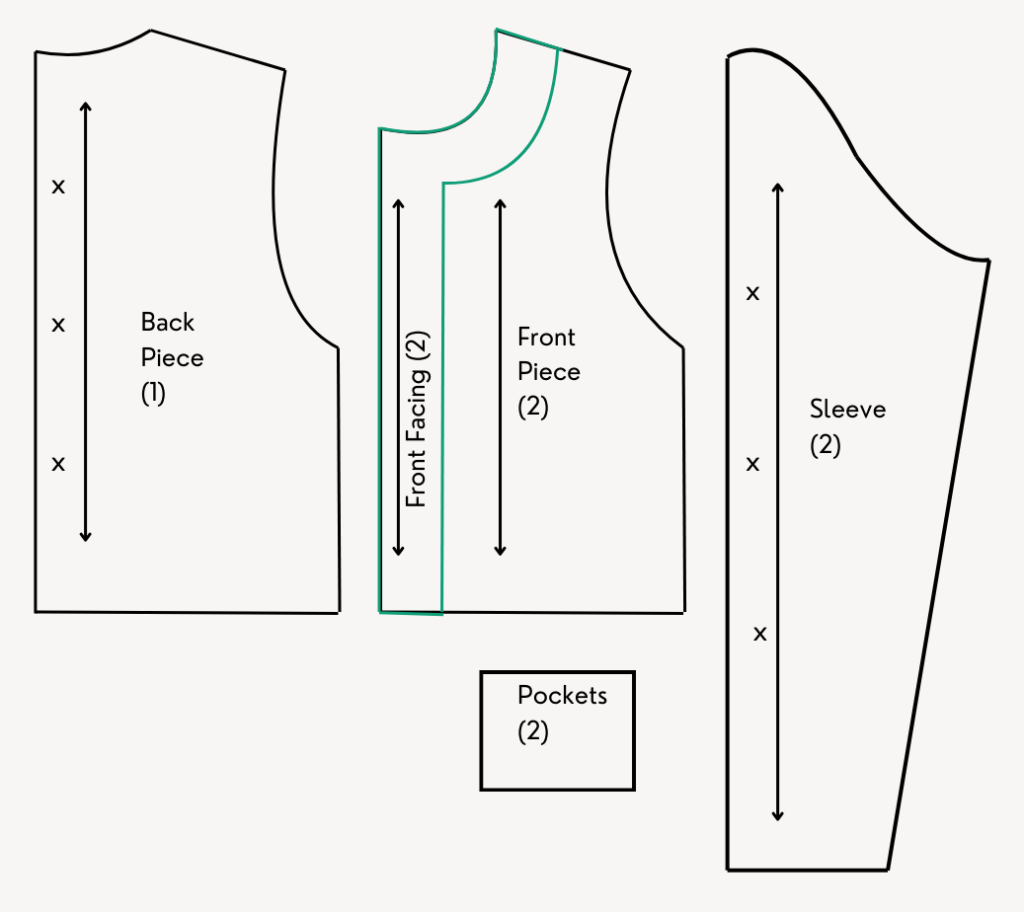
Step 1: Back Piece
- Start by measuring from the base of your neck (center back) down to the desired cropped length. Add 2-3 cm for seam allowance.
- Width: Measure across your shoulders and divide by two. This will be the width of the upper part. Add 1-2 cm for ease.
- Shape: Create a slight curve along the neckline and sides to give the piece a natural fit.
Step 2: Front Pieces
- Base shape: Use the back piece as a guide for length and shoulder width. However, split this into two symmetrical pieces.
- Neckline: Lower the neckline in the front, depending on your design preference (we will make a rounded neck).
- Button overlap (optional): If you’re adding buttons, extend the center edges by 2-3 cm for overlap.
Step 3: Facing Pieces
- Trace: For the facings, trace the shape of the neckline and the button overlap from your front and back pieces.
- Width: These pieces should be about 5-8 cm wide. They’ll be sewn inside to give the jacket a clean finish.
Step 4: Sleeves
- Measure the length of your arm from the shoulder to the desired length (cropped sleeves or full-length). Add 2-3 cm for seam allowance.
- Width and curve: Measure around the widest part of your upper arm and add 2-4 cm for ease.
- Cap curve: To ensure the sleeve fits into the armhole, draw a curve at the top of the sleeve (called the sleeve cap) that matches the shape of the armhole on your bodice.
Step 5: Patch Pockets
- Cut two rectangles measuring 12 x 10 cm for your pockets.
- Add seam allowance (1 cm on all sides) when cutting the fabric.
General Tips for Pattern-Making:
- Use a ruler for straight lines and a French curve for armholes and necklines.
- Label each piece clearly (“Back,” “Front Left,” “Front Right,” etc.).
Cutting the Fabric
- Once you’ve traced all your pieces (back, front, sleeves, facings, and pockets) onto the fabric or paper, cut them out carefully, ensuring you leave the seam allowance (about 1 cm) on all edges.
- Double-check you have:
- 1 Back piece
- 2 Front pieces (left and right)
- 2 Sleeve pieces
- 2 Facing pieces (for front and neckline)
- 2 Pocket pieces
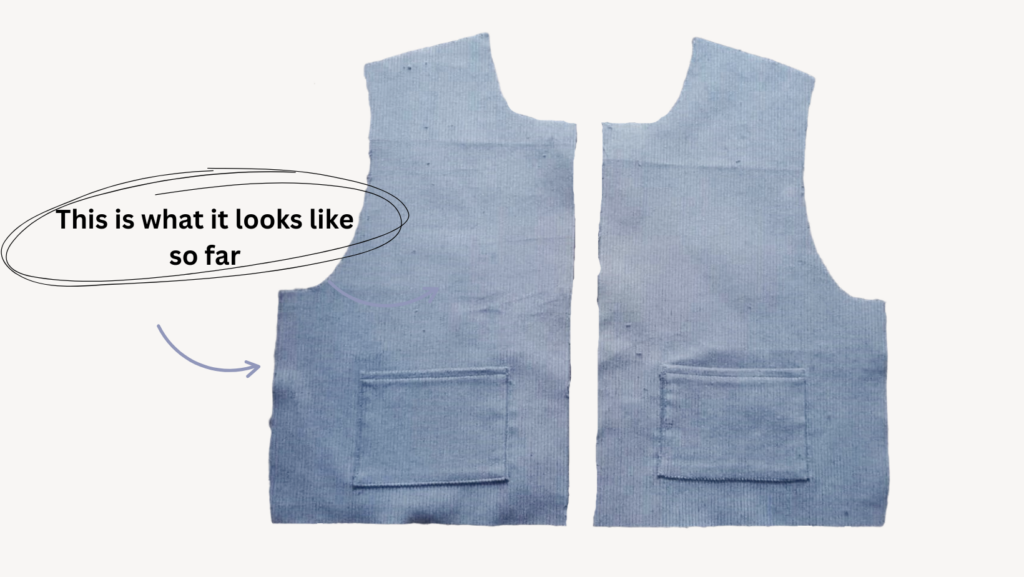
Now that your pieces are cut and the pockets are in place, we’re ready to move on to assembling the jacket!
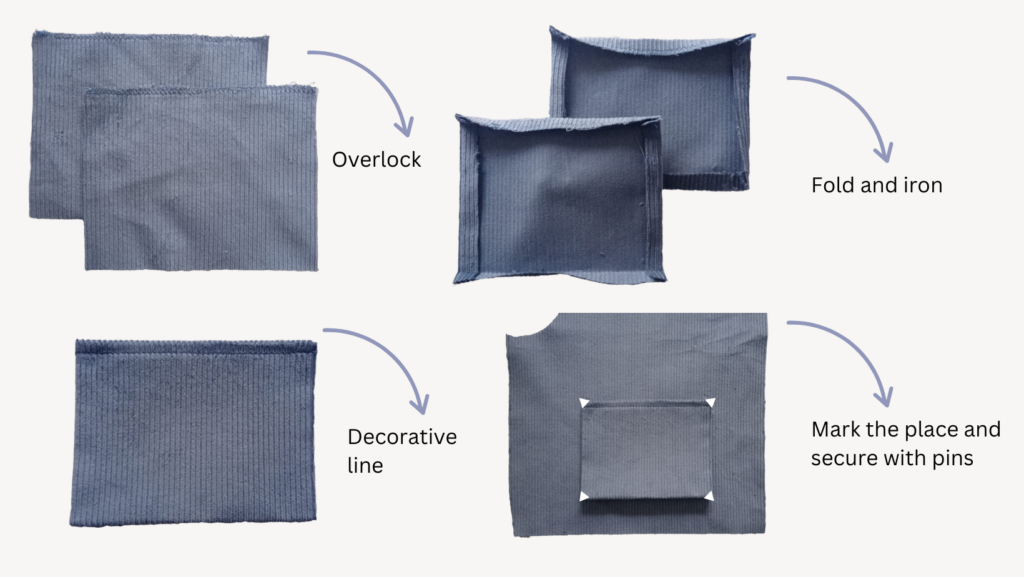
Step 6: Sewing the Patch Pockets
- Overlock (or zigzag stitch) one of the wider edges of each pocket to prevent fraying.
- On all four sides, fold and press 1 cm inwards with an iron to prepare for sewing.
- Sew a straight line about 1 cm from the edge of the overlocked side for a clean and decorative finish.
- Use tailor’s chalk or a fabric marker to mark where you want the pockets on the front pieces of your jacket. Make sure they’re symmetrical.
- Pin the pockets securely in place with straight pins.
- Sew the pockets to the jacket front, stitching a few millimeters from the edge on the three remaining sides (excluding the decorative top edge).
- Reinforce the corners at the top for extra durability.
Step 7: Front Facings
- (You can overlock the edges of the fabric).
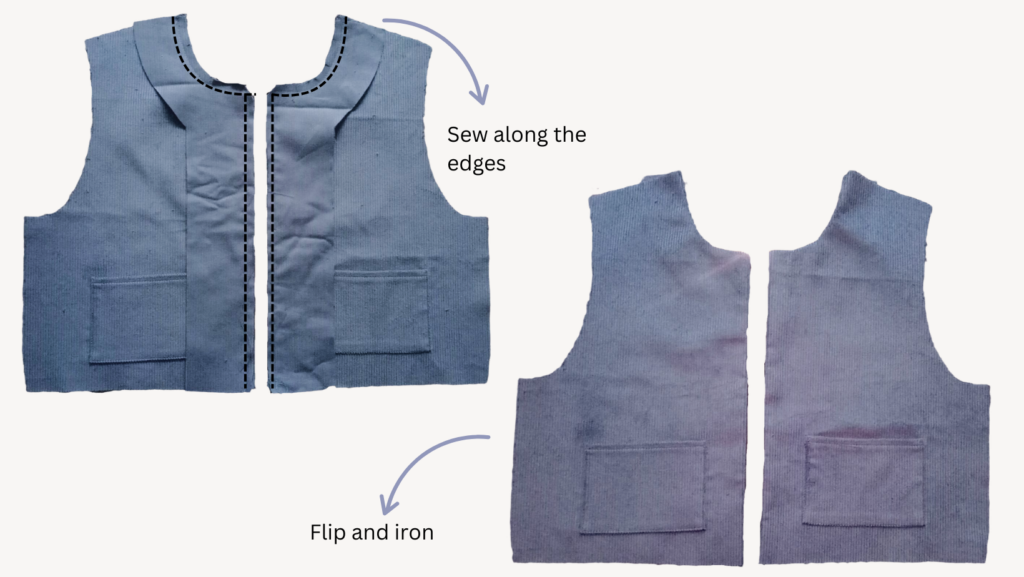
- Place the front facings and the front jacket pieces right sides together (fabric front against fabric front) as shown in the image.
- Stitch along the neckline and the center front edge using a 1 cm seam allowance.
- Carefully trim the excess fabric along the stitched edges to reduce bulk. You can also clip small notches along any curves for a cleaner finish.
- Flip the facings to the inside of the jacket so the seam is hidden.
- Use an iron to press the edges flat, ensuring the seams lay smoothly and in place.
This step creates a clean and polished edge along the front and neckline of your cropped jacket. Now you’re ready to move on to the next stage!
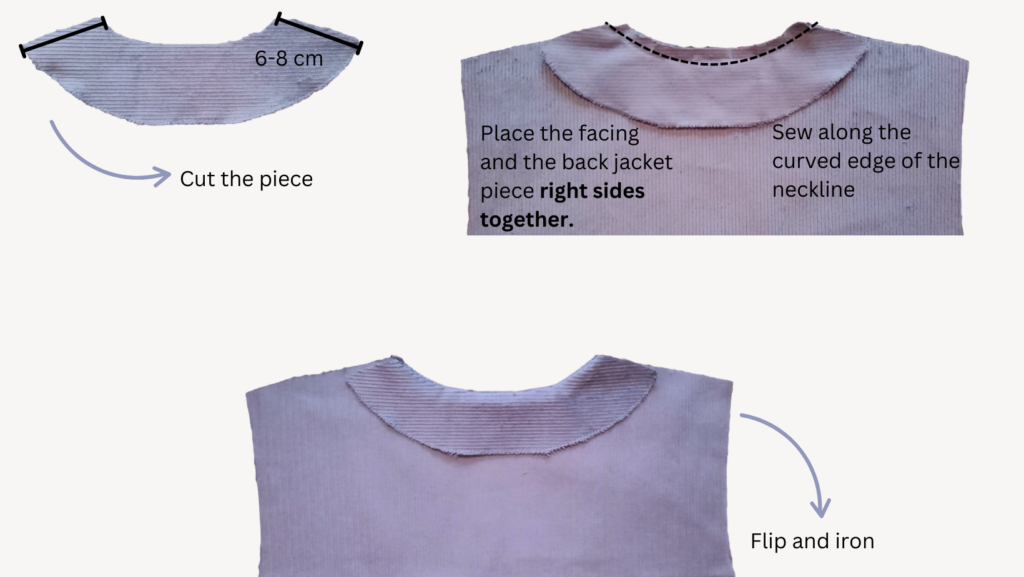
Step 8: Creating and Attaching the Back Facing
This piece will also help us improve the finish of the jacket!
- Use the back neckline of your jacket as a guide.
- Draw a facing piece with the same curve as the neckline and make it the same width as the front facings (approximately 5–8 cm, depending on your preference).
- Once traced, cut the back facing from your fabric.
- Use an overlock machine or a zigzag stitch to finish the wider curve of the back facing. This prevents fraying and adds a clean look.
- Place the facing and the back jacket piece right sides together (front of the fabrics facing each other).
- Pin the back facing along the neckline curve.
- Sew along the curved edge of the neckline with a 1 cm seam allowance.
- Trim the seam allowance for a neat finish and flip the facing to the inside and press it flat with an iron.
Step 9: Join the Shoulders
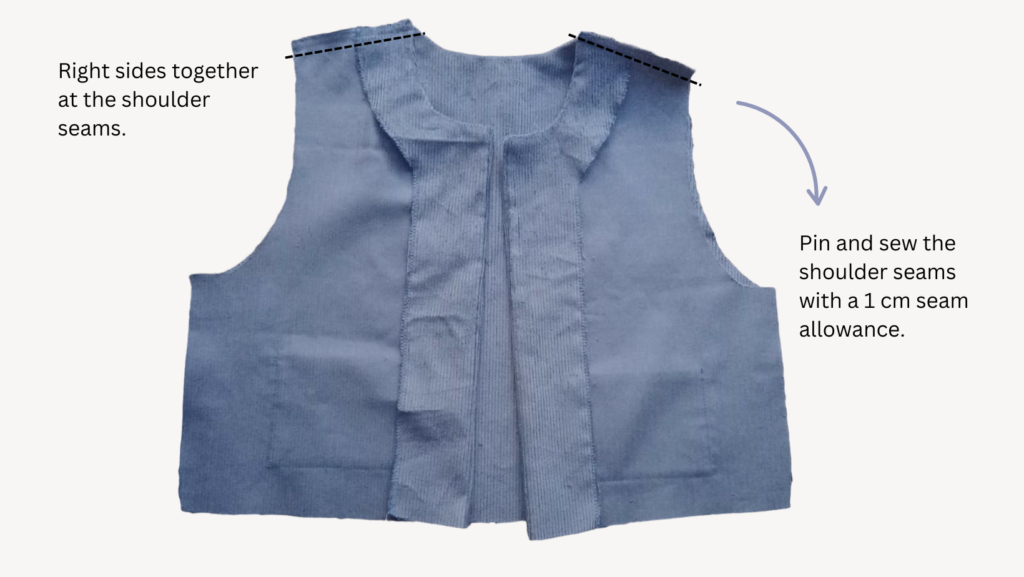
- With the front jacket pieces and the back jacket piece ready (facings in place), align them right sides together at the shoulder seams.
- Pin and sew the shoulder seams with a 1 cm seam allowance.
- Press the seams open or toward the back for a clean, professional finish.
Step 10: Decorative Topstitching
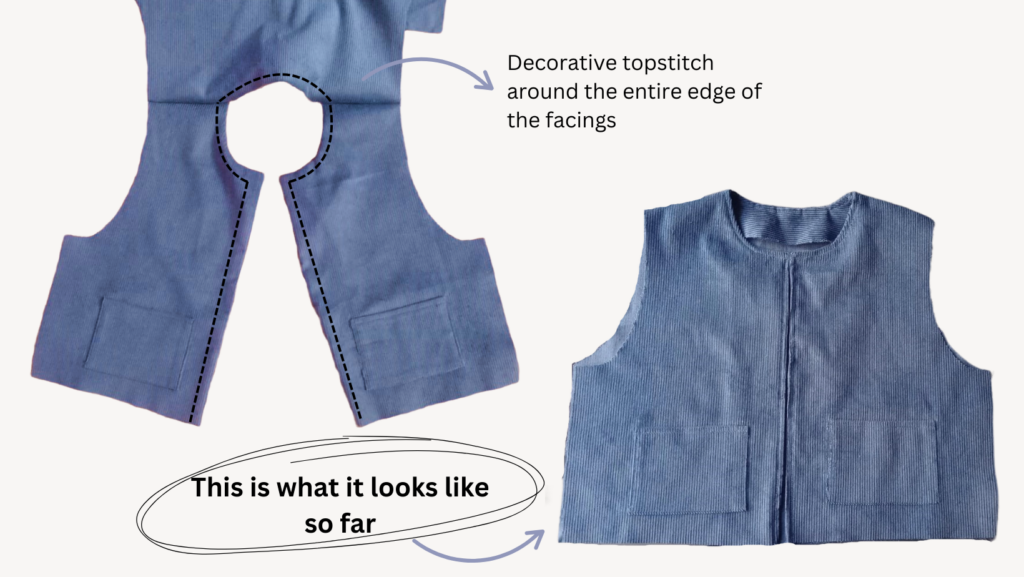
- With the jacket turned right side out, press all the facings (front and back) flat so they stay in place.
- Using the edge of the presser foot as a guide, sew a decorative topstitch around the entire edge of the facings, including the neckline and front opening. This stitch acts as both a reinforcement and an aesthetic detail.
- Once sewn, press the jacket again to set the seams and ensure everything lies flat.
Step 11: Preparing the Sleeves
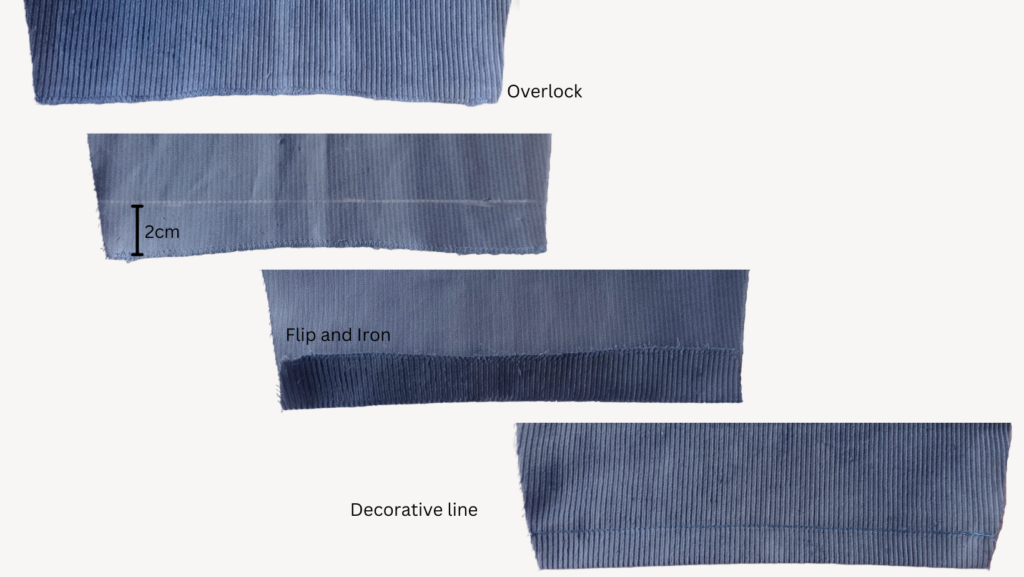
- Use a serger/overlock stitch or zigzag stitch to finish the raw edge of the sleeve cuffs.
- Measure 2 cm from the cuff edge and make a guideline with chalk or a fabric marker.
- Fold the fabric towards the inside along this line and press it flat with an iron to hold the shape.
- Sew a decorative stitch about 1.5 cm from the folded edge of the cuff. This gives the sleeve a clean, polished look and reinforces the hem.
With your sleeves prepared, you’re now ready to attach them to your jacket!
Step 12: Sewing the Sleeves
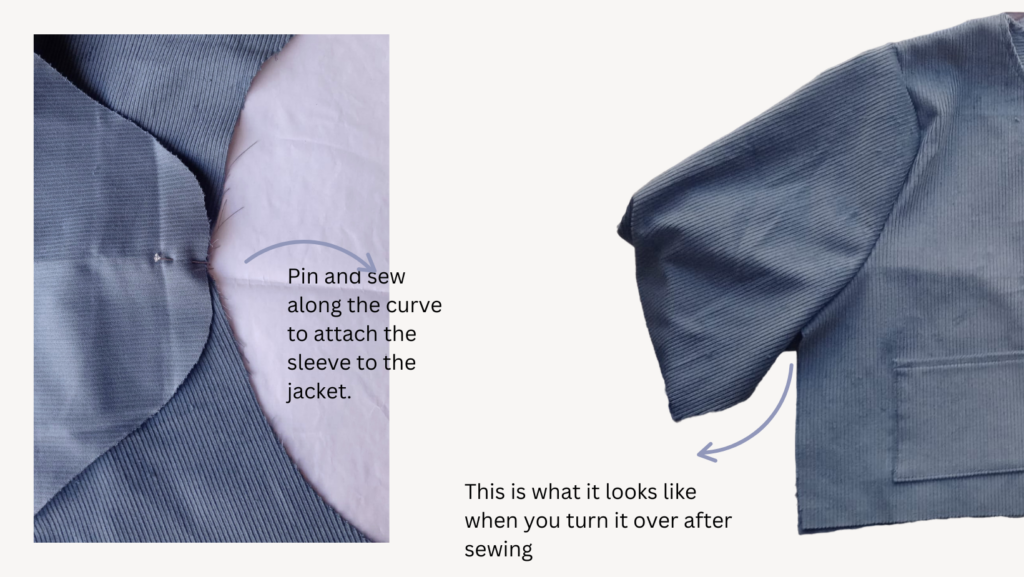
- Place the sleeve cap (the curved top part of the sleeve) against the armhole of the jacket, right sides together.
- Pin carefully, ensuring the center of the sleeve cap aligns with the shoulder seam.
- Sew along the curve to attach the sleeve to the jacket.
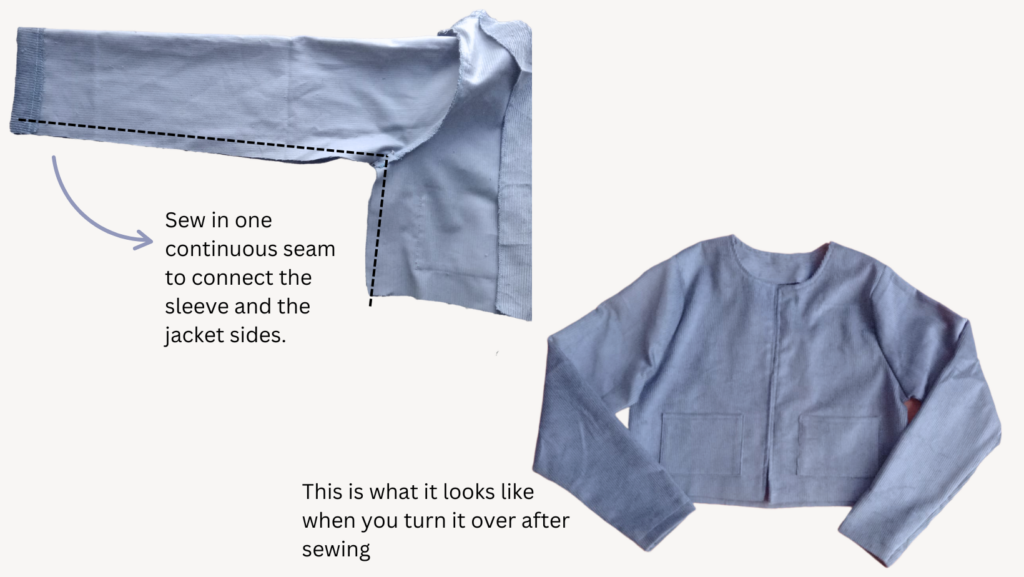
Sew the side seams and sleeve seams:
- Fold the jacket so the sleeves and sides are aligned, right sides together.
- Pin from the underarm all the way to the cuff and down the side seam of the jacket.
- Sew in one continuous seam to connect the sleeve and the jacket sides.
- Turn the jacket right side out.
- If needed, press the seams gently to smooth and flatten any wrinkles.
Your sleeves are now securely in place, and your jacket is taking shape beautifully!
Step 13: Finishing the Hem
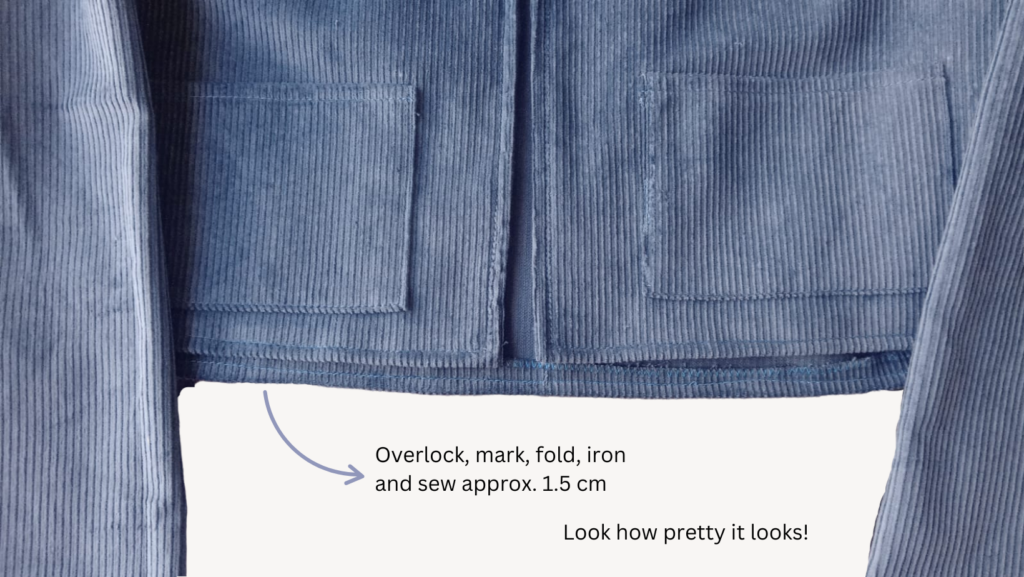
- Use a serger (or zigzag stitch) to finish the raw edge of the hem.
- Fold the hem 1 cm inward (towards the wrong side of the fabric) and press it neatly with an iron.
- Sew along the edge of the fold, either 1.5 cm from the edge or at the width of the presser foot for a clean and polished finish.
Step 14: Add Buttonholes and Buttons
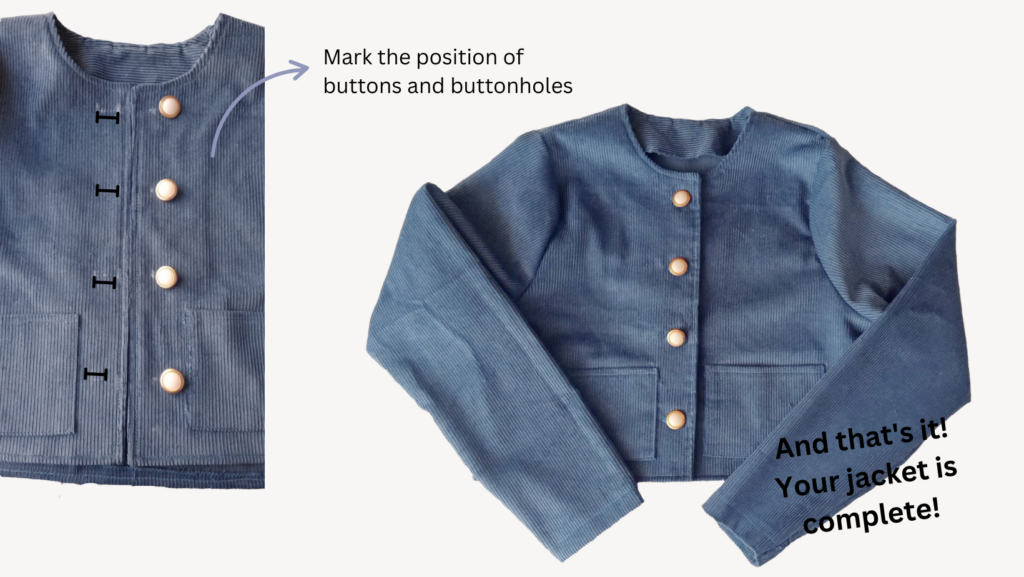
- Mark where the buttonholes and buttons will go (based on the front overlap and fit of your jacket).
- Sew the buttonholes: Use a buttonhole foot on your machine or sew them manually if you prefer.
- Hand-sew or machine-sew the buttons securely on the opposite side of the buttonholes.
Congratulations on reaching the end of this tutorial!
You’ve created a versatile cropped jacket that combines comfort and adaptability, making it a perfect addition to any wardrobe. Its design allows it to fit effortlessly into many different styles, whether you’re going for a casual daytime look or a more polished outfit for an evening out.
Get ready to slay! Your full set is now complete… don’t wait any longer to rock your new look!
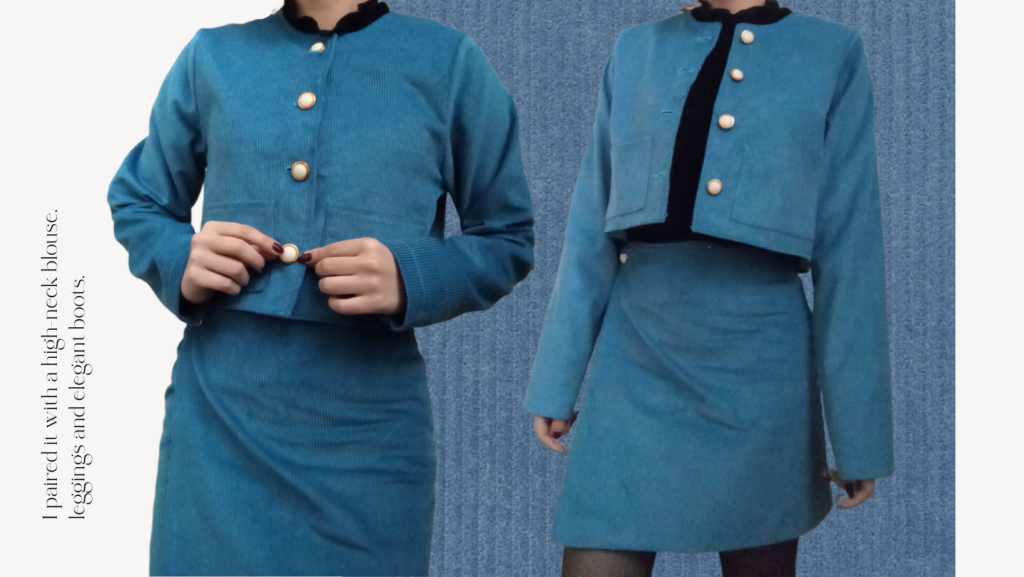
Sewing your own clothing is not only a beautiful and rewarding hobby but also a sustainable way to express your style. By making your own pieces, you’re reducing waste and crafting garments with love and care.
A special thanks to Fabric Wholesale Direct for providing the stunning corduroy fabric used in this project.
If you want to know how to create your own matching skirt click here: Skirt Tutorial.


Could you do the classic, natural and ingenue or the classic, natural and angelic blend?
This tutorial was also very helpful! Great work!
Hi Magnolia! You can expect those in the next 2 weeks. So, very soon!