If you love basking in the sun and enjoying the warm evening, staying comfortable during the peak period of hot weather can be pretty difficult; those few weeks where we experience warmer temperatures often catch us off guard but hopefully, this tutorial will show you don’t have to sacrifice style for comfort in the heat. It’s possible to be comfortable and look chic in hot weather this season! We’ll make a simple handkerchief top, or bandana top, that will be ideal for the heat. However, pay attention! You can also wear it in the winter by layering it.
The best part is that you can do it with materials that we have at home, you can look for recycled fabric, you can use old clothes and give them a twist, you can even use various fabrics to make your look even more unique, I leave it up to your imagination!
what do I need?
♡ Fabric of your choice (depending on your size the amount of fabric you need from 1 yard to 2 yards).
♡ Thread of the color you want.
♡ 3 or 4 buttons.
♡ Scissors or a roller cutter.
♡ Sewing machine or needle. (You can easily make the top without a sewing machine).
♡ Tape measure.
ready, set, go…
step 1: measure yourself
1. Measure from where you want the top to hit and down to where you want the bottom of the top. (Consider measuring above your chest to give your top a comfortable length).
2. Measure from the same point where you want the top to hit but now on the side, down to where you want the bottom of the top. (Increase 1.5 inches if you want to make darts later to make the garment fit closer to the body).
3. Bust contour
Follow the image to locate the measurements and write them down:

If you want to learn how to adjust your measurements perfectly, you can also review this article: https://ourfashiongarden.com/how-to-measure-yourself-correctly/
step 2: Front side top
I am using leftover fabric from a natural dye project, so you may notice some lines and marks of different shades.
On the wrong side of the fabric, mark a line that measures half the contour of your chest, divide this line in half and from there draw down the line of the central measurement that your top will have. On the sides trace the length measurement you decided. Finally, connect the sidelines to the one in the center so that it looks like this:


Next, we will mark the seam contour leaving a 0.5-inch margin except for the upper part, where we will give a 1-inch margin. After this, you can carefully cut your piece.


step 3: darts
This step is optional. It is only necessary if you want your garment to fit even more to the body, otherwise you can skip this step and your top will look just as cute. If do you want to sew darts, this is what you should do:
Measure from the top of the garment to the highest point of your chest and mark it on the fabric (do not consider the margin we previously left, mark from the original lines).
From this point, make 2 marks of 0.75 inch each, up and down respectively. Then draw a horizontal line toward the center that measures 4.5 inches approx. Finally, join these lines as if you were drawing a triangle. You already have your dart! Do the same on the other side.


step 4: backside top
To trace the back of your top, you can help yourself with the front piece you already cut. Position it on top of the fabric to serve as a kind of guide, as you can see in the first image:
*If you traced the dart, make sure to first close it by bringing the two 0.75-inch marks together and securing it with a pin.

The back piece should look like a rectangle, made from the mid-chest and side measurements.
On one of the sides, add 2 inches. This will be the space to put the buttons.
And don’t forget! Ignoring the button side, the rest of your piece should have a 0.5-inch margin. As a result, the front and back match.
Finally, you can cut your piece and mark another precisely the same and cut it. You should end up with two exact pieces.


Ready! Now we have all our pieces, let’s sew.
step 5: how to sew darts
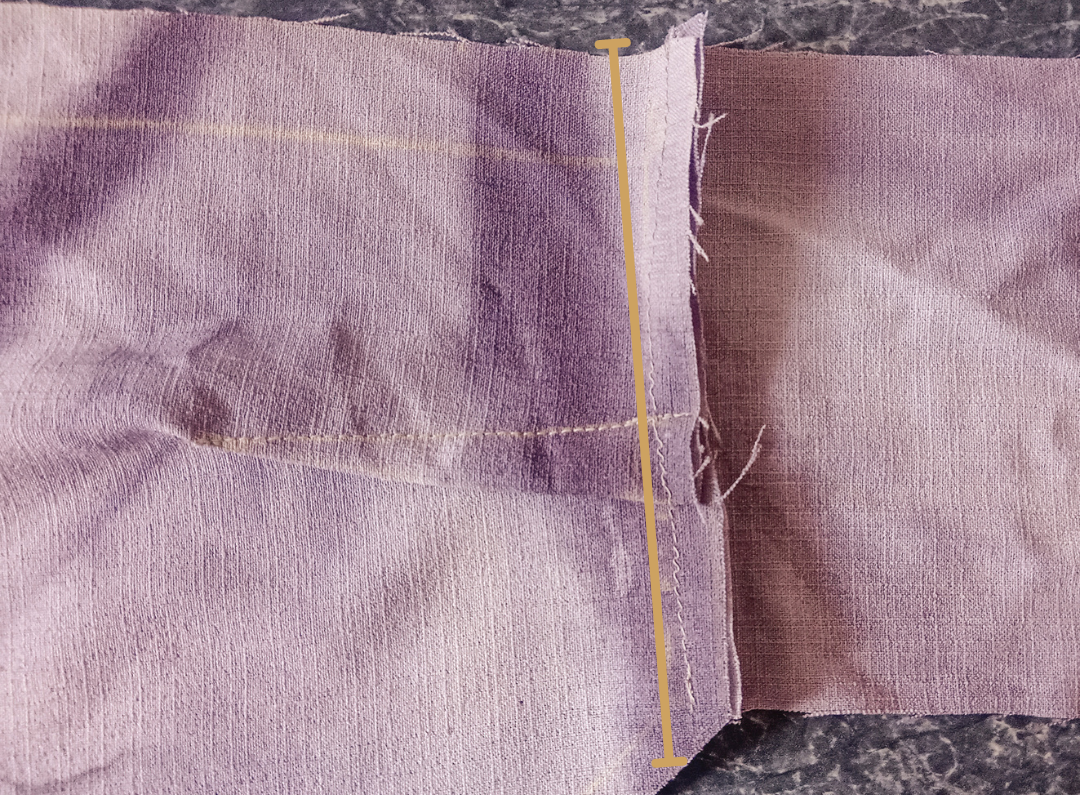
Join the two smaller marks on the dart and secure it with a pin. Sew along the visible diagonal line, and remember that the seam should be on the wrong side of the fabric. Do the same with the other side. Then you can iron them. This is how they should look on the back and front:


step 6: sew the sides
Take one of your back pieces and confront it with the front of the top. For the edges to match. The good sides of the fabrics must touch, which means, once again all the seams will be on the wrong side of the garment.
Pin your pieces and sew. You can sew by hand or machine in a straight line, following the margin mark.


I reinforced the edges of this seam with a zig-zag stitch, which can be done by machine or by hand.
step 7: top hem
Remember we left a 1-inch margin? Next, we will work on this point of the garment.
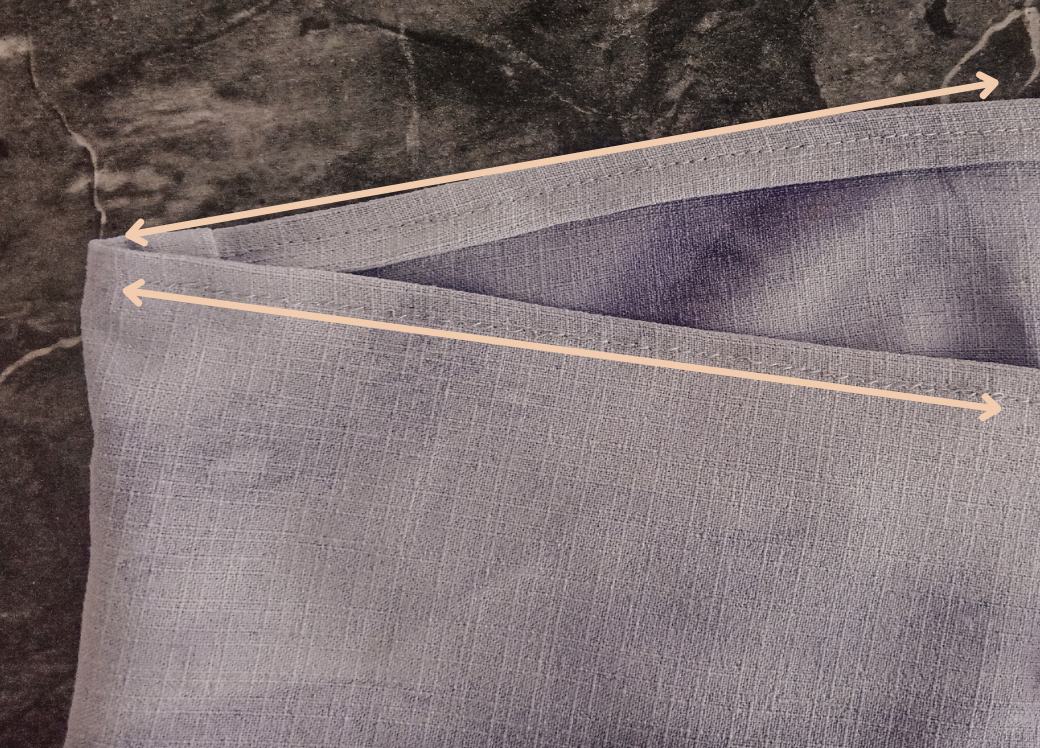
Take the edge of the fabric, fold it in 0.5 inches and repeat that same step so that the edge is “locked in.” Do this across the entire top, you can pin and iron to make the seam easier to execute. In these photos, you can see how to stitch and how it looks from the front and back.


step 8: lower hem
For the entire bottom part, we will fold 0.5 inch inwards. In the same way, as we did before, you can iron and hold with pins and then pass the seam through the entire bottom part of your garment. This is what the seam looks like in the “V” of our top:


Our top is almost finished; all that remains is to add the buttons!

step 9: buttons
We will take one of the ends of our garment where we previously marked the 2-inch margin. We will fold in 1 inch and repeat this so that the edge of the fabric is enclosed. With the folded fabric you can do a stitch lengthwise, it is like doing a hem but vertically. Repeat this at the other end.


Now with a pencil, chalk, or textile soap, we will make marks where we will place the buttons later. Be sure to support yourself with your tape measure and mark the same distance between each button on both sides. Before sewing the buttons we will make the buttonholes, using our machine or opening the fabric with scissors or a seam ripper. But we just need enough opening for the buttons to go through, cut carefully. If you’re working by hand, be sure to stitch around your buttonhole so the fabric doesn’t fray. Once this step is finished, we can sew the buttons on the marks.


And your top is ready!!! Perfect to combine with skirts, pants, and various other garments, it all depends on your creativity.


[…] you’re on the lookout for a cute top you can try this DIY Handkerchief Top Tutorial and make one for yourself! It’s super easy and perfect for your summer capsule wardrobe. Try it […]